Tampilkan postingan dengan label DIY. Tampilkan semua postingan

Senin, 03 Februari 2014

Tuesday DIY: a fab walk-in wardrobe on a shoe-string

In the first chapter of The Happiness Project, Gretchen Rubin talks about how de-cluttering and organising your home is the first step to feeling happier. I have to say, I admire people who make organising spaces look so effortless. One girl who knows her stuff is the talented interior designer Nina Holst from the Norwegian blog Stylizimo. She created this fab DIY walk-in-wardrobe on a shoe-string budget.


Nina Holst, Stylizimo with kind permission

I spy two MALM chest of drawers, the STOLMEN used as a clothing rack, BYGEL which nina spray painted herself in gold, and two LEDSJÖ lamps all from IKEA.

To read more about how Nina created this space you can check out the original post here.

I would love to organise my jewellery and sunglasses in the same way in my dressing room. Thanks so much for the idea Nina! For more cool wardrobe inspiration you can always check here.

And if you're up for other DIY ideas this week you might want to check out this simple dotted wall, a cloud shaped door mat or a wall clock using a leather belt. So simple yet so cool. 

We are traveling South (in Thailand) tomorrow so I am handing the reigns to Dagny of Icelandic blog Feel Inspired for the day. Have a lovely day and I'll be back Thursday!

Senin, 20 Januari 2014

Tuesday DIY: fab yet simple way to update a wall

I came across this really fab, yet relatively simple polka dot wall DIY project over at My 2nd Hand Life. Maiju found a reel of dot stickers and stuck them at random over one wall. I absolutely love the outcome how about you? What a simple yet cool way to update a space.


My 2nd Hand Life with kind permission found via Feel Inspired

Could you imagine covering a wall in your home with polka dots?

I've been thinking of renovating my little girls room with heart stickers (or one of these shapes). the question is do I just place them on a white wall or should I paint the wall in a pretty colour first? Tips welcome!

This is another great DIY project for updating a wall (potato printing - who'd have thought?

If you're feeling creative this week you can find more fab DIY projects here and here. And feel free to leave your own tips in the comment section below.

Have a lovely day!

Senin, 30 Desember 2013

Reclaimed wood works


 Old is good. What is old can be new again with a little ingenuity, and I don't mind admitting that the art side of my brain has lots of that.   I think reclaimed wood  is beautiful, and this summer I made great finds on the beaches near our summer house.

Are you wondering how this connects to decor?  Keep reading!

reclaimed wood Newfoundland
Atlantic Ocean beach wood
 Storm tossed and sea sanded house/shed remnants  were dragged home against my better half's judgement. At the time I answered the strong call emitted by these materials, but  I didn't know why I needed them.  My art often begins with the call of materials rather than with sketches and preconceived notions of a final product.

 Margaret Ryall Duntara workshop
Not a pretty site/sight
No this is not the home decor section!

Move over hubby,  I am taking possessions of your precious workshed and tools.  Yep!  I know my way around drills, bandsaws, chopsaws and sanders and I discovered construction adhesive will stick most everything together. Drop paintbrushes, fine papers and canvas.  I have a new palette and perhaps a new series for exhibition.

This one is my keeper.
Reclaimed wood assemblage Beach Quilt Margaret Ryall
Beach Quilt, Margaret Ryall, 2013, reclaimed wood
 And here it is in the back entry of my summer house.  I have to wait until May to see it again (and take some decent shots of it).

You've reached the home decor part
Stay tuned for more creative moments in my life.  What have you created for your home lately?

Rabu, 02 Oktober 2013

Weekend DIY: Plus garland (and a fab little boys room)

Yesterday I wrote about one of my favourite blogs SMÄM by Swedish illustrator / designer Sara Woodrow. Today I'd like to share one of her fab DIY ideas: a plus garland. Sara designed it for her little boy Alfie's room (and what an incredible little boys room it is!) but I think you could use it anywhere, and you won't believe how simple it is to make! Weekend project anyone? 


SMÄM Sara Woodrow with kind permission

Looking to make your own plus garland? Here's how: All you need is a white thread and black electrical tape. Cut the tape into four equal strips and then stick them together either side of the wire equally spaced apart. As simple as that! You could also create stars, hearts, letters.....

Thank you Sara for allowing me to share all your lovely images and ideas this week!

PS How wonderful is her little boys room?! For more Scandinavian children's bedrooms I love this, this and this one. Oh and how cute is this one to embrace the spirit of winter? It was one of the first posts I ever did!

PPS If you're looking for cute little children's clothing don't forget my sponsors Loja Dada and Babyssimo for very cool, baby clothes with a twist or Smallable for the mini designer! :)

Hope it's sunny where you are as it is in Malmö today.

Senin, 09 September 2013

Monday DIY - the simplest, cutest idea ever.

Hello Monday! I hope you had a great weekend? If you're looking for a simple way to update your home this week or even just something creative to do, how about this incredibly simple yet cool textile / wallpaper project? It's the brainchild of Frk Hansen who was inspired by Ferm Living's beautiful half-moon wallpaper. Frk Hansen used a fabric marker, textile paint, and a potato to create the monochrome design. Yes, a potato! I'm on it! 


Photos 1,2,3,4 Frk Hansen - with kind permission. Photo 5: Ferm Living

Pretty cool project don't you think? You could always swap the half moons for hearts like in the image below (or buy very cute heart stickers from Ferm Living). 


Ferm Living
And while we're on the subject of children's rooms (although even as an adult I could definitely have those half-moons and hearts on my wall, couldn't you?!), I'm extremely excited to introduce my new sponsor Babyssimo who sells the most cute children's things ever. Cue gorgeous baby pyjamas, accessories (mittens with faces anyone?!), and measuring giraffes. Oh and there's their Tocoto Vintage range too....*sigh* can one of my friends have a baby soon please so I can get shopping?

Have a lovely Monday!

Rabu, 05 Juni 2013

Wednesday DIY - hallway cloud

With the arrival of Summer (sort of) here in the North, little feet are going in and out of the front door all day long to collect scooters, tricycles, buckets and spades.....a doormat is therefore essential, but they're often so boring aren't they? I was so excited to come across this very cool cloud shaped DIY door mat by Shine Design. It's cool, cheap and quick to make! Genius! 


Shine Design with kind permission

Here's how to make it: buy a door mat like the Lynäs from IKEA. Find a cloud shape you would like to replicate and use a bowl to draw around to recreate the shape on the doormat. Cut out with a pair of scissors!

Something for your hallway perhaps?

PS I love hearing about DIY projects for the home, if you have any you would like to share please send me an e-mail at myscandinavianhome@gmail.com.

Have a lovely day!

Minggu, 09 Desember 2012

Guest post: DIY Christmas Tree


I am happy to jump in here at My Scandinavian Home this second Sunday of Advent. My name is Mette and my blog is called Make-Living which has a DIY focus.
This Christmas tree DIY idea came to me when I saw a picture of a similar one over at Tierlantijn but couldn't order it. It's similar to the one in shown in a Christmas post last year here on MSH and that has been doing the rounds on Pinterest. I Hope this little Christmas DIY inspires you too! :)


This Christmas tree is quite neat. You can make it as big as you like, and can have it both indoors and outdoors. And the best thing is that it lights up any dark space at home without needles all over the floor…..And you can use it year after year!!!   

What you need:
  • One wood panel approximately 7 cm wide for the tree trunk, which you can make as tall as you like ( mine is about 1 meter)
  • A number of 7 cm wide wood panels for the branches (I have used 7). Cut the branches in staggered lengths so that they form the shape of the tree you would like. I made a triangular template in the shape I wanted and then cut the branches accrording to this.
  • Nail the branches onto the trunk at an approximate distance of 5 - 7 cm
  • I used a special grey wood stain (not paint) to give the wood an old touch

All photographs Make Living

How about you? Do you have any plans for Christmas DIY that you'd like to share with My Scandinavian Home and Make-Living? I'd love to hear your ideas.

PS. Thank you my lovely man for helping me put this Christmas tree together and thank you Niki for letting me share my Christmas DIY here on My Scandinavian Home.

Happy 2nd Sunday of Advent to you all!

Senin, 26 November 2012

My home: advent calendar

December is just days away - soooo excited as it's my favourite month! This year I've actually made my own advent calendar. Now, I'm not really the queen of DIY but it was so much fun being creative. Each envelope will hold a clue to help the girls find the present hidden somewhere in our home (they love hide and seek!) which explains why they're looking so flat! I hope they enjoy it.


My Scandinavian Home

 It was so easy to make as you can probably see from the pics! All I did was take 12 envelopes which I cut in half (we only had big ones at home), a black glitter pen, the black and white washi tape I bought in japan and my good old black board painted wall. The only thing I need to do next is re-arrange the numbers to make it a little tricker for my girls to find the day.

Are you making an advent calendar this year?

PS Back a little later today with a lovely home tour!

PPS Tomorrow I'm holding a BIG give-away on my blog, so exciting! I only wich I could win the Danish design prize myself!

Rabu, 15 Februari 2012

No one will ever know

 You can never have too many vases or luminaries. Creating your own  from materials on hand is both fun and cost effective.  You also get to have the pleasure of looking at it every day and knowing that you upcycled something.  Of course, accolades from your friends and family don't go astray either.

  Here are some of my personal favourite ideas collected from  Pinterest.    Happy creating.


 I would use these for their sculptural value and forget the greenery which looks forced.  Get various shapes and sizes of clear wine bottles.  Tape off or use adhesive stickers to create design.  Spray paint white and there you have it.  So easy and they would look very interesting massed together on a table top or mantle.


So, so easy!  Use elastic bands  to stretch around  around the clear cylinder vase .  Vary the position of the bands and make sure you have some overlapping, then spray paint. When the candles are lit the design is greatly enhanced. You can now buy battery powered candles which would work best in something this tall.


Check out the very detailed instructions for creating this tissue paper collaged vase.


 You may have seen this idea in Canadian House & Home.   Wait for a nice day where you can take your spray paint outside. Clean (remove any labels and adhesive)  and dry the bottles and then by pouring a dollop of paint into the bottle, gradually rotate/swirl the paint inside until the paint coats the entire interior. Some may need two coats. Dry on a damp or plastic dropsheet.  I think the colour you use will make or break this look.  I'm particularly fond of the sea glass green blues.
Update: Watch a video how-to by Stephanie White on House and Home's TV.


 Print your photo on Lazertran paper, making sure the image prints on the chalky eggshell side. Let dry for 30 minutes. Cut the image to size. Soak the printout facedown in a pan of water for about a minute. Peel off the backing and place the filmy printout onto a ceramic vase, smoothing out any air bubbles.


These look stunning and they are so, so easy to make using Krylon  Looking Glass Mirrorlike  Spray Paint. Clean out the vases/votive,  spray the interiors lightly with water and then with mirror paint. Turn upside down and let dry overnight.  Repeat the process if the first application looks too sheer. If you want to use them for flowers you have to inert a small glass inside to hold the water. Imagine the beautiful table centerpiece these would create using some with flowers and some with candles.


Minggu, 08 Januari 2012

DIY wow factor for walls

If I had oodles of money I would buy all the art my heart desires and I would have more walls!  In reality I have an interesting  art collection that I've grown over time , but not all of my wall decor is fine art.  There are so many other things you can do to add a WOW factor to your walls without breaking the bank.  Here are some of my favourites.

Enlarge and frame print material


Display your collections artfully 

Pinterest


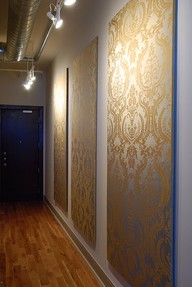
Use wall paper and fabric in creative ways


Frame post cards, pages from old books, or photoographs


Spray paint sculptural objects
Hope there's an idea here for your walls.
Related Posts Plugin for WordPress, Blogger...